
If you’re hosting a coaching call, a webinar, or any other event, you understand the struggle of getting attendees to show up. If you’re looking to increase user engagement and boost conversions, incorporating an event calendar can be a game-changer. The event calendar tool I use is Addevent. Addevent is an awesome tool that allows you to integrate events into your website, including your landing page. In this comprehensive guide, I’ll walk you step-by-step through the process of how to add a calendar reminder to a landing page.
Why Use Addevent on Your Landing Page?
Before we dive into the how, let’s briefly discuss why integrating Addevent into your landing page can be beneficial:
- Convenience and Accessibility: One main benefit of adding calendar buttons is the convenience and accessibility they offer to potential attendees. By simply clicking on the button, users can effortlessly save the event details directly to their preferred digital calendars, such as Google Calendar, Outlook, or iCal. This feature eliminates the hassle of manually entering event information, reducing the chances of human error and ensuring accuracy. Attendees can easily access event reminders, locations, and other essential details from their calendars, increasing the likelihood of event attendance.
- Reduce Attrition Rates: There’s an ongoing issue of registered attendees failing to show up for events—a significant challenge when you’re hosting conferences, webinars, workshops, or seminars. However, incorporating “add to calendar” buttons can help this issue. By providing attendees with a simple way to save the event to their calendars, you make it easier for them to keep track of the event and minimize the chances of forgetting or double-booking. This strategy significantly reduces attrition rates, increasing guest attendance and providing greater engagement from attendees.
- Increase Attendance and Engagement: When attendees add an event to their calendars, they signal their intent to participate and engage with your organization. By integrating the “add to calendar” feature across your event promotion channels, including websites, email invitations, and social media posts, you can make it easier for potential attendees to commit to your event while reducing the risk of error. This increased commitment translates into higher attendance rates, ensuring a larger audience for your event. The more attendees you have, the greater the potential for building meaningful connections, generating leads, increasing sales, and driving business growth.
Now that we understand the advantages, let’s get started on the process of adding Addevent to your landing page.
Step 1: Sign Up for an Addevent Account
If you don’t already have an Addevent account, the first step is to sign up. It’s a straightforward process, and you can start with a free account to get familiar with the platform.
Here’s what you need to do:
- Go to the Addevent website.
- Click on the “Sign Up” or “Get Started” button.
- Follow the on-screen instructions to create your account. You’ll need to provide your email address and choose a password.
Once you’ve completed the registration, you’ll have access to your Addevent dashboard, where you can create and customize an event.
Step 2: Create Your Event
It’s time to create your event:
- Once you’re logged in and have accessed your dashboard, click on the “Create Event” button.
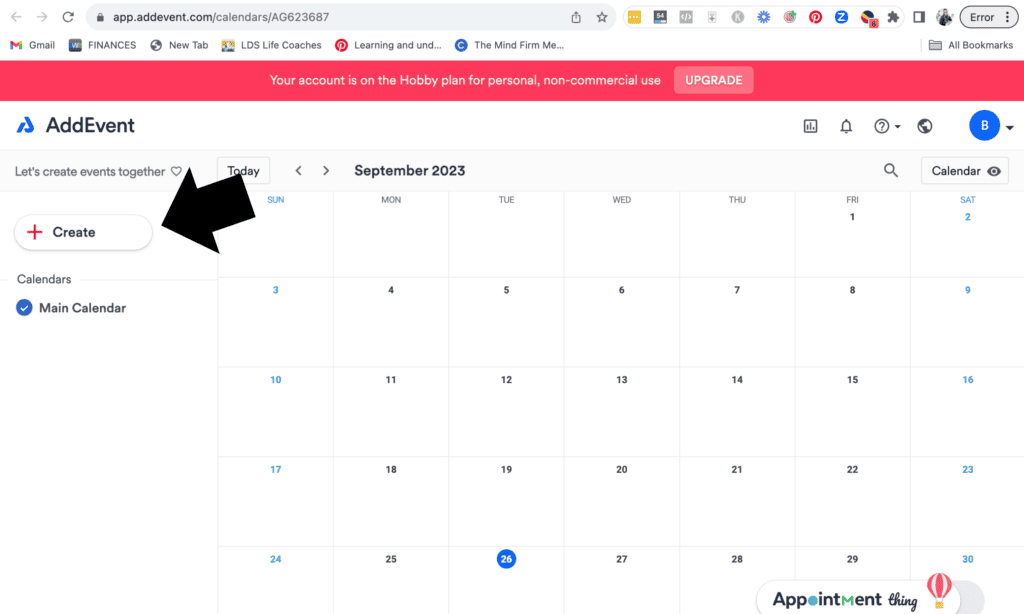
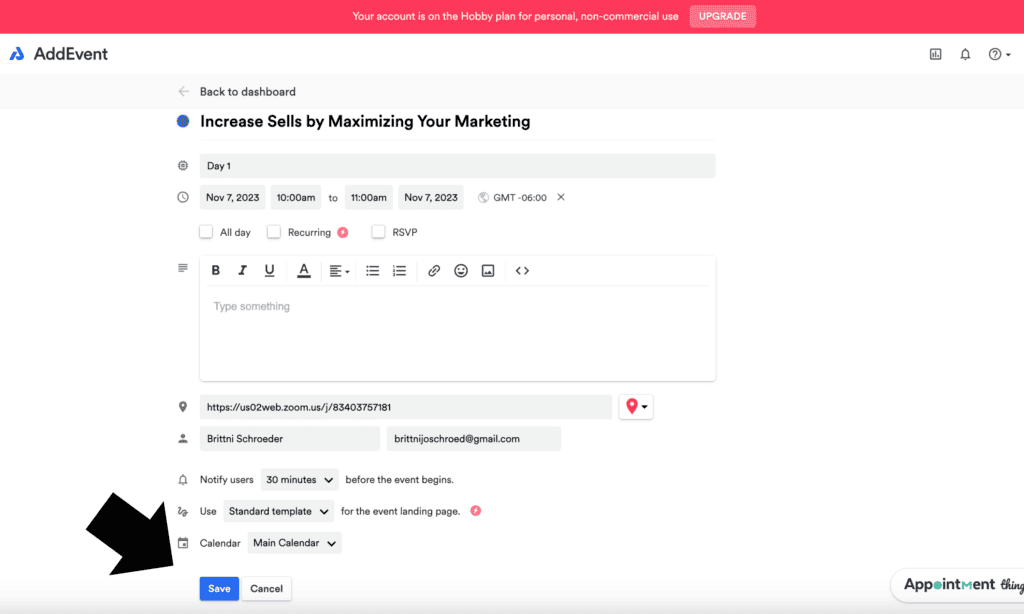
- Fill in the event information, including the event title, date, time, location, and any additional details you want to include. Be as specific as possible to provide users with all the necessary information.

- Customization: The paid Addevent plan offers customization options that allow you to match the event’s appearance with your landing page’s design. You can choose colors, fonts, and sizes that complement your site’s aesthetics.
- Save or Publish: Once you’ve filled in all the event details and customized the widget to your liking, you can choose to save it as a draft or publish it immediately.
Step 3: Generate the Embed Code
Now that your event is created and customized, it’s time to generate the embed code. This code will allow you to place the event widget on your landing page by following these steps:
- From your event’s dashboard, click on the event you want to embed.
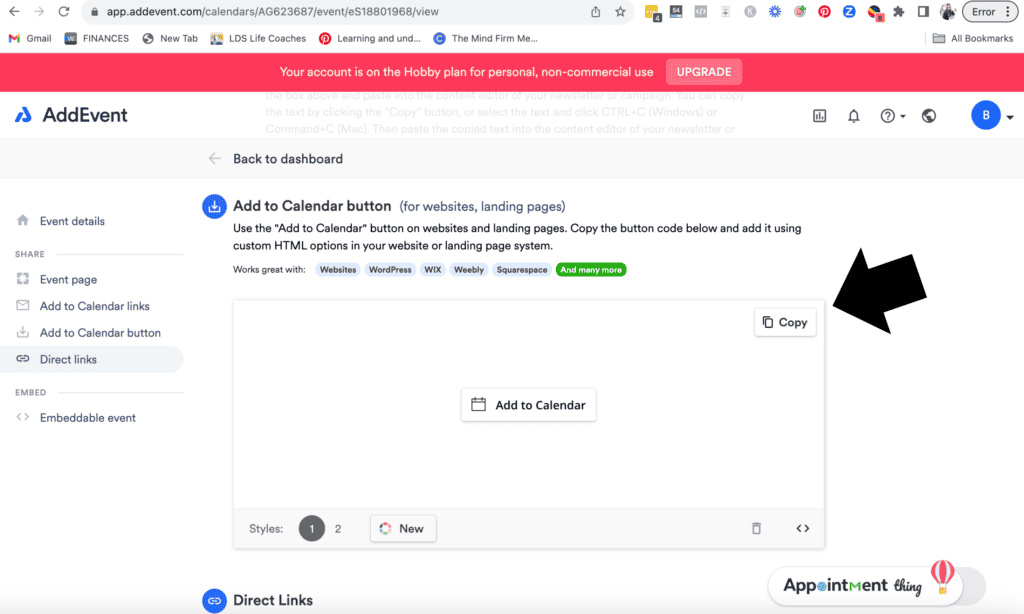
- In the event’s details, click on the “Widget” tab.
- Generate Code: After customizing the widget, click the “Generate Code” button. Addevent will generate an HTML code snippet you can add to your landing page.
- Copy the Code: Click on the code snippet to select it, and then copy it to your clipboard. You’ll need this code to embed the event on your landing page.
Step 4: Add Addevent to Your Landing Page
Now that you have the embed code, it’s time to add your Addevent event to your landing page. The specific steps for this process may vary depending on your website builder or content management system (CMS). However, the general process involves editing the HTML of your landing page and pasting the code snippet you copied earlier.
Here are the general steps to add Addevent to your landing page:
- Access Your Landing Page: Log in to your website builder, and access the landing page you want to edit.
- Locate the section of your landing page where you want to add the event calendar.
- Paste the Code: In the HTML editor, paste the Addevent code snippet you copied earlier. Make sure to place it where you want the event calendar to appear.
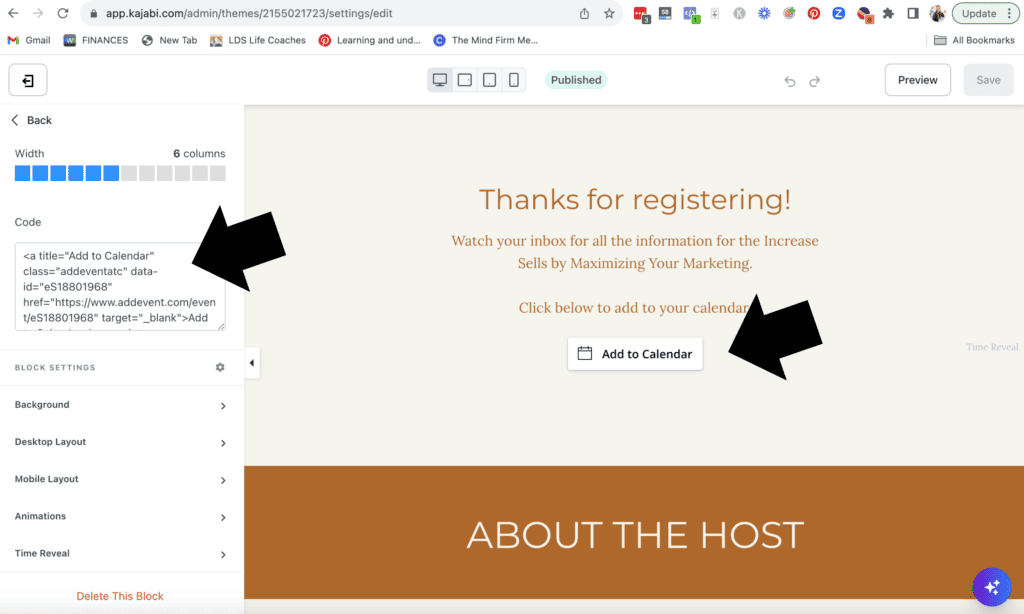
- Save your changes, and update your landing page. This will apply the changes and make the event calendar visible to your visitors.
Step 5: Test Your Landing Page
After adding Addevent to your landing page, it’s crucial to test it to ensure everything is working correctly. Here’s what you should check:
- Confirm that the event calendar appears as intended on your landing page. Verify that the colors and fonts match your site’s design.
- Event Information: Click on the events within the calendar to ensure that all event details are displayed accurately.
- Responsiveness: Check how the event calendar looks on various devices, including desktops, tablets, and smartphones. Ensure that it’s responsive and user-friendly on all screen sizes.
Once you have added the calendar reminder to your event landing page, now it’s time to promote, promote, promote.